
14. Basic animation
Of course, pixels will always be whole numbers (type int).
So the sinue values must be cast with: }
(c) 2005, Thomas J.H. Luif
Drawing a sinusoid
Some figures can be described by means of mathematical equations. You may, for
instance, have come across a sinusoid:
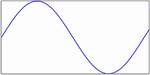
This is the graph of the equation: y
= sin x.
You can't just use this equation to draw in an applet, anyway not unchanged. The width
of this graph is 2π (a little more than 6), while an average applet window will be a few hundred
pixels wide.
Moreover, the maximum and minimum values of this sinusoid are -1 and +1,
whereas your average applet window is at least a hundred pixels high.
Besides, the larger values of graphs are usually at the top, while the applet window
has its largest values at the bottom.
Consequently, three values will have to be converted:
The program makes use of the variables lastX
and lastY because we don't draw dots, but small
lines between the points of the sinusoid. Hence, after drawing any of these
lines,
lastX
and lastY will be assigned the values of x
and y.
This is what the program looks like:
// A sinusoid drawn in an applet
import java.applet.*;
import java.awt.*;
public class Sinusoid extends Applet {
public void paint (Graphics g) {
}
setBackground (Color.white);
Dimension d = getSize();
int x, y, winWidth = d.width, winHeight = d.height;
int halfHeight = winHeight / 2;
int lastX = 0, lastY = halfHeight;
double trajectory = 2 * Math.PI;
double factor = trajectory / winWidth;
for (x = 1; x <= winWidth; x++) {
double sine = Math.sin (x * factor) *
halfHeight;
y = halfHeight - (int)sine;
g.drawLine (x, y, lastX, lastY);
lastX = x; lastY = y;
}
}
And here is a working applet:
More body and colour: a Dutch flag
Our sinusoid may be interesting to mathematicians. It's probably less suitable
to serve for an average illustration. We may try to give the figure a little
more body, for instance something like this:
Probably the best way to make this figure is by making use of the class
Polygon, which we saw in chapter 13.
There are a number of ways to define the points of a polygon. In this tutorial
we choose two arrays, one with horizontal and the other with vertical coordinates,
which should look like this:
g.drawPolygon (horArray,
vertArray, arrayLength);
The points that will make any of the three coloured bands will have to look like this:
These points (defined by the values laid down in the two arrays) will be
connected by drawPolygon / fillPoygon. Needless to say that the coordinates of the points are determined by
sine values.
The program makes use of the method fillArrays, in
which - as the name suggests - the two arrays are filled.
int fillArrays
(int h[ ], int v[ ],
int xStart, int wd, int yStart, int he, int step)
(The line is split into two because it may otherwise be split accidentally with
certain screen resolutions.)
The method is of the int type. It returns the
size of that part of the arrays that is filled with coordinates: the arrays have been declared
with ample space. We normally use only a part of them.
Apart of the two arrays, this method has 5 more variables, which are:
First attempt at animation
Before we present the program here, we're first going to change it in such a way that the "wave" will move. This can be
done by repeatedly adding a little bit (called: extra)
to the number whose sine is taken.
The method fillArrays will look like this:
int fillArrays
(int h[ ],int v[ ],int xStart,int wd,int yStart,int ht,int step,double extra)
It's no real animation: whenever a button is clicked a new picture will be drawn, so that we get a kind of slow and primitive cartoon movie.
This is what the program looks like:
// A flag which moves by clicking a button
import java.applet.*;
import java.awt.*;
import java.awt.event.*;
public class Flag1 extends Applet implements ActionListener {
Button but = new Button ("click");
}
double add = 0;
public void init () {
setBackground (Color.black);
add (but);
but.addActionListener (this);
}
public void paint (Graphics g) {
Dimension d = getSize();
int height = d.height, width = d.width;
int x[ ] = new int[2*width], y[ ] = new int[2*width];
for (int color=0; color<3; color++) {
switch(color) {
case 0: g.setColor (Color.red); break;
case 1: g.setColor (Color.white); break;
case 2: g.setColor (Color.blue);
}
// The following 2 lines are
actually one:
int size = fillArrays
(x, y, width/8, 3*width/4, (1+color)*height/5,
height/5, 5, add);
g.fillPolygon (x, y, size);
}
}
// The following 2 lines are actually one:
int fillArrays
(int h[ ], int v[ ], int xStart, int wd, int yStart, int ht, int step,
double extra) {
int count = 0;
// top line of the
colour band:
for (int i=xStart; (i<=xStart+wd); i += step) {
h[count] = i;
v[count++] = yStart+(int)(ht*Math.sin(i/(0.2*wd)+extra));
}
int n = count -1;
// The values of
the bottom line are not calculated.
// They're equal to to the values of the top line
+ ht
for (int i=h[count-1]; i>=xStart; i-=step) {
h[count] = i;
v[count++] = v[n--]+ht;
}
return count;
}
public void actionPerformed (ActionEvent evt) {
add += 0.7;
repaint();
}
And this is what the applet looks like:
A better animation with a "thread"
Suppose we would change our program in such a way that the applet continuously
draws new images without clicking a button. Then the animation would probably go too
fast.
But we would run into another problem as well: the applet does
exactly as we order it: it will just go on and on and will be hard to stop.
Both problems will be solved by the use of a so-called thread.
Modern computer systems (such as Windows or Linux) can do several tasks
simultaneously. You can download a file from the Internet while you are using a
word processor. This is sometimes referred to as multi-tasking.
In a multi-tasking system, the tasks are performed by different programs using
different parts of memory.
An applet cannot do multi-tasking, but it can perform different tasks using the same
memory space. Those separate tasks are called threads. This way of
performing several tasks is called multi-threading
If we don't take special measures, an applet will perform just one task. When
carrying out an animation, the system must be ordered to do the drawing as a
separate process. This can be done by means of a thread (which is an object of
the class
Thread).
First, an object of the class Thread must be
declared (for instance: myThread) with:
Thread myThread;
Then myThread can be initialized. This is a done
in the method start(), which we make by overriding the standard
applet method start. As
we saw in part 5, this method start
will be run every time the applet is started.
public void start( ) {
The line myThread = new Thread (this) creates a
real thread. Only the thread must start running. In order to get this done, the
method
run of the thread must be invoked with myThread.start ( ).
if (myThread == null) {
myThread = new Thread (this);
myThread.start ( );
}
}
An applet, however, does not have a method run().
We can introduce the method via the interface Runnable.
As we saw earlier (in
part 11), methods not present in the class can be introduced with an interface.
Our method run( ) will look like this:
public void run () {
The expression
for (; ;) is a loop in which the three control expressions are
missing, which means the loop will just go on and on.
for (; ;) {
try {
repaint();
myThread.sleep
(delay);
extra +=
0.2;
}
catch (InterruptedException e) {
};
}
}
The thread may be interrupted. Hence we must use the try/catch construction (also
discussed in chapter 10).
Every time again, a new image is made by repaint(),
after which the execution of the thread is suspended for some time by the method sleep,
which waits for 60/1000 of a second. For the duration of
that period any other tasks may be carried out.
Then the incrementation extra += 0.2; will cause
the sinusoid to be moved a bit to the left in the next image.
When the thread is ended, the method stop()
is invoked which takes care that while the thread is not active, it won't make
use of any system resources.
And here is the program:
// A waving banner
import java.applet.*;
import java.awt.*;
public class Flag2 extends Applet implements Runnable {
Thread myThread;
int delay = 60; // 60/1000 second
double extra;
public void init () {
setBackground (Color.black);
}
public void run () {
for (;;) {
try {
repaint();
myThread.sleep
(delay);
extra +=0.2;
}
catch (InterruptedException e) {};
}
}
public void start () {
if (myThread == null) {
myThread = new Thread (this);
myThread.start();
}
}
public void stop () {
if (myThread != null) {
myThread.stop();
myThread = null;
}
}
public void paint (Graphics g) {
Dimension d = getSize();
int height = d.height, width = d.width;
int x[ ] = new int[2*width], y[ ] = new int[2*width];
for (int color=0; color<3; color++) {
switch(color) {
case 0: g.setColor (Color.red); break;
case 1: g.setColor (Color.white); break;
case 2: g.setColor (Color.blue);
}
int size = fillArrays
(x, y, width/8,
3*width/4, (1+color)*height/5, height/5, 5, extra);
g.fillPolygon (x, y, size);
}
}
int fillArrays
(int h[], int v[], int xStart, int wd, int yStart, int
ht, int step, double extra) {
int count = 0;
for (int i=xStart; (i<=xStart+wd); i += step) {
h[count] = i;
v[count++] = yStart+(int)(ht*Math.sin(i/(0.3*wd)+extra));
}
int n = count - 1;
for (int i=h[count - 1]; i>=xStart; i -= step) {
h[count] = i;
v[count++] = v[n--]+ht;
}
return count;
}
The applet will look like this:
"Double buffering"
You may have noticed that our last animation did not look entirely perfect. The
image showed some flickering.
We can construct the image in memory and then move it to the screen memory in
one fast move, which gives a much steadier image.
We declare the image img in memory with:
Image img;
What we also need is a graphical context (gBuf)
to draw the image in memory.
Graphics gBuf;
These were only the declarations. In paint
we'll initialize both of them:
if (img == null) {
One cause of the flickering is that repaint()
completely wipes out the image. We are going to change that. As we saw in
chapter 11, we can override the applet method update(),
so it no longer wipes out the screen.
img = createImage (width, height);
gBuf = img.getGraphics();
}
public void update (Graphics g) {
We'll actually wipe out the image by covering it with a black rectangle:
paint(g);
}
gBuf.setColor (Color.black);
gBuf.fillRect (0, 0,
width, height);
The rest will not be drawn directly to the screen either, but will first be
stored in memory:
gBuf.fillPolygon (x,
y, Size);
Once the image is completed, it will be moved to the screen memory
with:
if (img != null)
And here is the complete program:
g.drawImage (img, 0, 0, null);
// a waving banner made with "double buffering"
import java.applet.*;
import java.awt.*;
public class Flag3 extends Applet implements Runnable {
private Thread thread;
}
int delay = 60;
double extra = 0;
Image img;
Graphics gBuf;
public void run () {
for (;;) {
try {
repaint();
thread.sleep (delay);
extra += 0.2;
}
catch (InterruptedException e) { };
}
}
public void start () {
if (thread == null) {
thread = new Thread (this);
thread.start();
}
}
public void stop () {
if (thread != null) {
thread.stop();
thread = null;
}
}
public void paint (Graphics g) {
Dimension d = getSize();
int width = d.width, height = d.height;
if (img == null) {
img = createImage (width, height);
gBuf = img.getGraphics();
}
gBuf.setColor (Color.black);
gBuf.fillRect (0,0,width,height);
int x[ ] = new int[2*width], y[ ] = new int[2*width];
for (int color=0; color<3; color++) {
switch(color) {
case 0: gBuf.setColor (Color.red);
break;
case 1: gBuf.setColor (Color.white);
break;
case 2: gBuf.setColor (Color.blue);
}
int size = fillArray
(x, y, width/8, 3*width/4, (1+color)*height/5,
height/5, 5, extra);
gBuf.fillPolygon (x, y, size);
}
if (img != null)
g.drawImage (img, 0, 0, null);
}
int fillArray
(int h[], int v[], int xStart, int wd, int yStart, int ht, int
step, double extra) {
int count = 0;
for (int i=xStart; (i<=xStart+wd); i += step) {
h[count] = i;
v[count++] = yStart+(int)(ht*Math.sin(i/(0.3*wd)+extra));
}
int n = count-1;
for (int i=h[count-1]; i>=xStart; i-=step) {
h[count] = i;
v[count++] = v[n--]+ht;
}
return count;
}
public void update (Graphics g) {
paint(g);
}
And here is what our final animation looks like:
Exercise 14.1
In chapter 6 we drew a circle that pulsates as long as we keep clicking a button.
Please make a program with an animation (which does not flicker) of a pulsating
circle.
Exercise 14.2
Make a marquee in which the text "Long live Java" (or another text of
10 to 20
characters) in big letters moves continuously from right to left on the screen.
Exercise 14.3
Add two buttons to the applet of 14.2 which will cause the text to move either
to the left or to the right.
To Chapter 15
Menu Java Tutorial
HOME
ALPHABETICAL INDEX
